Pain-free positions for your keyboard, mouse, monitor and chair
You may consider your workstation a harmless place to spend your day, but the fact is that your desk can mess you up. Back pain, eye strain, tendonitis, headaches, tense shoulders and more can be caused by a poor fit between you and your equipment.
Here, we offer a step-by-step guide to office ergonomics, that field of study that focuses on optimizing how we interact with our work environments.
With a few simple adjustments as recommended by NAIT’s Health and Safety Services, you should be able to trade that feeling of being chained to your desk for that of being uplifted by it, and capable of getting through the day pain free while you get things done.
Keyboard and mouse position
 The only time we need to be closer to a mouse is when we're at our desk jobs. Here's how close that piece of technology should be to you and your keyboard so as to reduce fatigue and strain on your neck, shoulders, hands and arms.
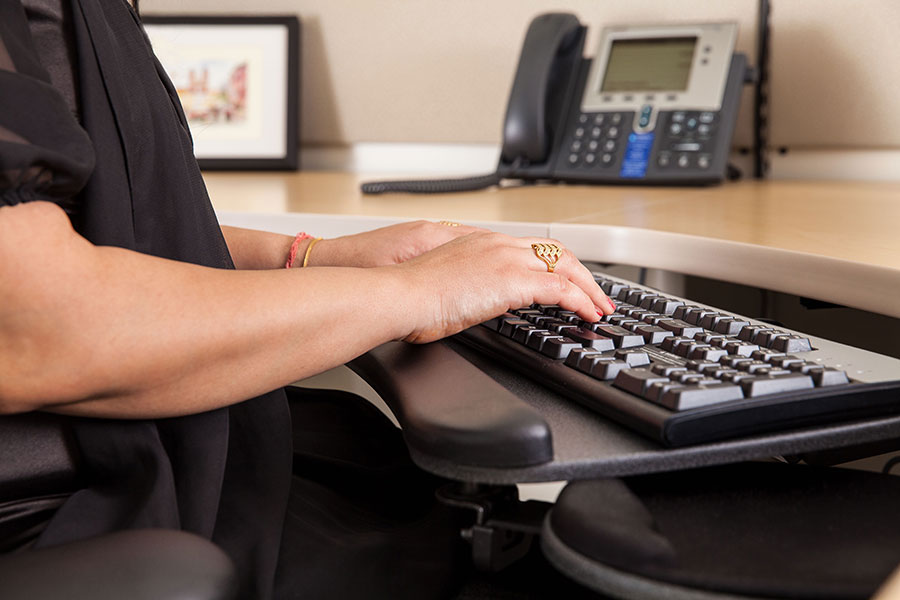
If you have trays for your keyboard and mouse, adjust them so that your
- elbows are at right angles or slightly greater
- forearms and hands form straight lines from the elbow to the keyboard
- wrists are elevated and straight
- fingers curve over the top of the keyboard
If your keyboard and mouse are on your desk, raise or lower your chair so your shoulders remain relaxed and elbows are at right angles (or slightly greater). If your feet no longer rest flat on the floor after these adjustments, use a foot rest.
Sit close – Position yourself close enough to the keyboard and mouse so so that your shoulders, upper arms and forearms can relax. Keep your mouse near the keyboard.
If possible, periodically switch the mouse to your other hand for a rest.
Switch hands – If possible, periodically switch the mouse to your other hand for a rest. To change the primary and secondary buttons on your mouse, go to the Start menu, select Control Panel and choose Mouse. Switching buttons is the first option in the Buttons tab.
Monitor position

You’re staring at a potential hazard: your monitor. For a more pleasant viewing experience, and less strain on your neck, shoulders and eyes, follow these tips.
Height – Arrange your monitor so the top line of text – not the top of the screen – is at eye level. If you wear bifocals or graduated lenses, your monitor should be positioned so that you can read text with a neutral head position (your head should not be tilted up to view the words). This may mean positioning your monitor lower than recommended.
Distance – Position the monitor at arm’s length to reduce eye strain and fatigue, and to decrease tension in your neck, shoulders and upper back. Maintain good posture. Keep your body and head squarely in front of your monitor; position your head so that your ears align with your shoulders.
Maintain good posture. Keep your body and head squarely in front of your monitor.
Multiple monitors – Position multiple monitors (of the same size) at the same height. Keep them as close together as possible and at arm's length. If you have one main monitor and one supporting, your main should be directly in front of you, in line with your keyboard and chair. If you use both monitors equally, place them side by side and centre your body and keyboard between them.
Lighting and glare – Adjust the brightness and contrast on your monitor to limit emitted light and to make it easier to see text on the screen. Ensure that there is reasonable ambient lighting and that monitors are perpendicular to windows and other strong light sources.
Chair position
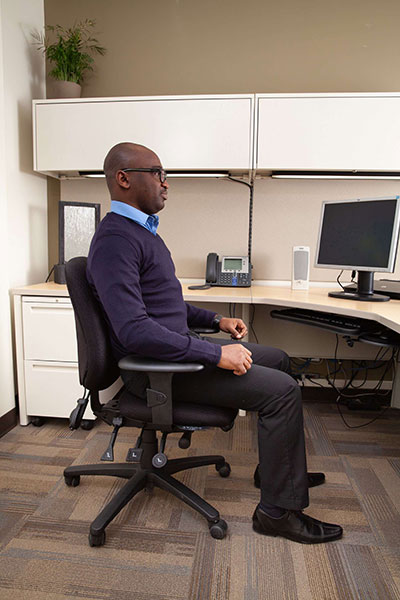 Your chair should support you like a best friend. To ensure it never lets you down, put your butt towards the back of the seat, then deal with the following.
Height – Proper seat height will help reduce stress and strain on your neck, back and joints. Raise or lower your seat until your
- feet are flat on the floor or a footrest
- knees are bent at a right angle
- thighs are parallel to the floor
Backrest – Proper lumbar support can reduce muscle fatigue and back pain. Raise or lower your backrest so that the curve of the chair fits your lower back when you're sitting upright or slightly reclined. If you don’t have a curved backrest, place a rolled-up towel or lumbar support pillow where your lower back meets the chair.
There should be two to four finger-widths of space between the backs of your knees and the edge of your seat.
Seat – There should be two to four finger-widths of space between the backs of your knees and the edge of your seat.
Armrests – To decrease stress on your shoulders and back, your forearms should rest comfortably on the armrests, with your shoulders relaxed. They shouldn't prevent you from placing your chair at a comfortable typing or viewing distance from the screen. If they do, remove them.